
There are several ways to grow your MF AUM; you can follow few key tricks to grow your AUM faster
To grow your AUM you must be continuously doing the exercise of Lead generation by way of Reference , Seminars, Campaigns etc . A survey says that a MFD business grows mostly by way of reference and Educative Seminars or sessions. Hence you should have a proper process to conduct your referral collections and Client Seminars

- Set proper expectations with potential references at the outset—and then meet them. Let customers know how you intend to use the references. For example, will you use the reference in public relations activities with the media? Do you intend to use the customer’s name and quotes on the website and in collateral materials? Or will the reference be asked to speak directly with future prospects?Find out whether your customer’s company has tight restrictions on public testimonials. As a general rule, you will have more luck with customer references if the customer contact doesn’t have to go through elaborate internal approvals on his or her end. Often, getting approval to connect a customer with a peer is acceptable, and ensuring you don’t overstep those preset boundaries can establish a successful, long-term relationship.Setting expectations also applies to the situations in which you place your customers. Don’t ask them to speak on a topic with which they aren’t familiar. And always try to match the job level and subject expertise of the person with whom they’ll be speaking. Putting customers in situations that aren’t well aligned with their expectations can quickly lead to frustration and minimize the business benefits you hope to achieve
- Learn their business for the most relevant, up-to-date references. The best way to match the right reference for a prospect or for marketing purposes is to learn how your customers have implemented your product or are using your service. How happy are they? Have they bought subsequent products from you? Has your contact changed positions or left the company? There’s nothing worse than serving up a customer reference who’s just had a hiccup with your product. Have an efficient way to update information in a centralized place, and always ask the sales rep for last-minute updates just before using that customer as a reference.=It’s also important to keep it personal. With numerous customers and a lot of activities happening at once, it can be hard to keep track of it all—but most of the time, a customer’s willingness to be a reference is ultimately based on a relationship either with you or with other individuals in your organization. Keeping track of these relationships can go a long way toward creating success.One often-overlooked angle is maintaining some visibility into customers who may be willing to serve as a reference, but for whatever reason, have not recently participated. You can track underused customers with some of the same methods previously mentioned. Find ways to reach out to these customers and either get them involved or let them know that they are still top of mind.
- Learn their business for the most relevant, up-to-date references. The best way to match the right reference for a prospect or for marketing purposes is to learn how your customers have implemented your product or are using your service. How happy are they? Have they bought subsequent products from you? Has your contact changed positions or left the company? There’s nothing worse than serving up a customer reference who’s just had a hiccup with your product. Have an efficient way to update information in a centralized place, and always ask the sales rep for last-minute updates just before using that customer as a reference.=It’s also important to keep it personal. With numerous customers and a lot of activities happening at once, it can be hard to keep track of it all—but most of the time, a customer’s willingness to be a reference is ultimately based on a relationship either with you or with other individuals in your organization. Keeping track of these relationships can go a long way toward creating success.One often-overlooked angle is maintaining some visibility into customers who may be willing to serve as a reference, but for whatever reason, have not recently participated. You can track underused customers with some of the same methods previously mentioned. Find ways to reach out to these customers and either get them involved or let them know that they are still top of mind.
- Let customers know their references are appreciated. Just as you would thank a friend who gave you a gift, it is important to acknowledge the value your customer has given to you. Send handwritten thank-you notes. Find out what is important to that client and start there. It might be as simple as getting connected with a product manager to give feedback. Get creative. Everyone likes to feel appreciated, and proper etiquette and timely follow up just might improve your customer satisfaction ratings, too.
Satisfied customers willing to serve as references for your new prospects often make the difference between winning and losing the sale. Getting and keeping those references, however, is a challenging and time-consuming job. While critical to the success of sales, this responsibility often falls into the lap of marketing and product management professionals who may not be as close to the individual customers as their sales representatives.

The most difficult part of a SEMINAR/ SESSION is the guest invitation. You need to plan the invitation as your first priority . Here are a few tips to reduce the risk of ‘no shows’, get the maximum number of clients to attend and deliver the best return on the time and money spent .
There are three distinct phases to holding a client seminar that advisers need to consider and each has a different focus:
- Pre-event - how to get the maximum number of people to attend the event.
- During event - ensure clients’ expectations are met.
- Post-event - follow up client requests, leverage the event with those clients who could not attend or did not show on the day, capture results and learnings for future events.
Pre-event
Objective Be clear on what you want to achieve. If your objective is to generate new prospects or connect with existing, high value clients that’s great. But it’s not enough. You need to quantify what you want to achieve. You should also be realistic about what to aim for. If you only have 100 people to invite is it likely you will get 50% to attend? Is your invitation and guest speaker line up compelling enough to deliver this kind of outcome?
Your objective should look something like this:- Invite 200 clients resulting in 25 clients (25%) or more attending the seminar.
- Generate 15 high quality leads resulting in five appointments.
By quantifying your objective you will then be able to measure how successful the event was. You also need to decide what is the minimum number of clients you need to attend to make the event viable.
Client list
The most cost efficient way to send invitations is email so ensure you can identify who you can email an invitation to and those clients that will need a hard copy invitation. For clients that you mail an invitation to, include a request form for them to update their contact details including their current email address.
Venue selection
Find a place that is central to where the majority of your clients live. Make sure there is plenty of parking and transport to it and it’s easy to find. If possible include a link to Google Maps in your confirmation email.
Invitation
A compelling invitation, well written and visually appealing works best. If you’re sending the invitation by email make sure it’s in the body of the email, not an attachment that clients have to click to open. By including the invitation in the email you can include an active email link for clients to click on to respond back to you. Give people a Yes/No option and set the subject line in the hyperlink so your staff know immediately when a response comes in if a client is coming or not. If you don’t give them a No option, people who can’t attend may not respond at all and you may have to follow them up anyway to find this out. Ensure you use the word ‘Invitation’ in the subject line and in the heading of the invitation in the email. If you’re concerned about low numbers, tell clients that their family and friends are welcome to attend.
RSVPs
Set the RSVP date for at least 2-3 weeks before the seminar date. This gives you time to ensure you have good visibility of how many clients have accepted, those who have not responded that you need to send a reminder to, and those who have declined.
Confirmation of attendance
Once you receive an RSVP from a client that they will be attending, send them an email confirming their attendance and remind them to put the event date and time in their dairy.
Follow Up non-respondents
Send a follow up reminder to clients who have not responded 3-4 days before the RSVP date in case they have lost the invitation or forgotten.
SMS Reminders
Reduce the chance of clients not showing up on the day by sending an SMS reminder 1 to 2 days prior to the event. This is a low cost option that gets noticed by clients and is a fantastic way to reduce the number of ‘no shows’. Include your phone number in the text so clients can let you know if they can’t attend on the day.
During Event
Presentations
These should be as engaging as possible with the information accessible to your audience, meaning the content is tailored to allow for the level of experience and knowledge of you audience. The best presentations are those where slides are not text heavy but use images and a few key words to talk to. Remember, PowerPoint was developed as an ‘aid memoir’; it is not a substitute for a word document.
Information Packs
Always include a copy of the presentations in your information pack printed out as Notes so people can write their comments and thoughts to refer back to. It’s a good idea to also include some factsheets about the topic you covered, your adviser profile, business contact details and other relevant information for clients to take home with them
Feedback/Follow Up Form
Always provide clients with a feed back form, either in their information packs or on the seats. The purpose of the forms is to gauge how much clients valued/enjoyed the seminar, quality of the speakers and venue and their suggestions for topics in future seminars. You can also use this form to invite clients to request a follow up appointment or call back or even recommend the name of a friend or relative you can contact who may be interested in the information.
Questions
Allowing time for questions at the end is a good way to get clients involved and to gauge their level of engagement with the topic. Sometimes it works if people can ask questions when they think of them rather than waiting until the end. If you do hold questions to the end, it can be a good idea to have someone prepared to ask a question to encourage others to do so
Post-eventThis is often the most neglected stage of a seminar but in fact can be one of the most important. Here is what you should be doing:
Follow up Actions
The day after the seminar follow up any action items: set up appointments, phone follow ups that clients have asked for directly or via the feedback forms.
Send a Thank You or Follow Up Email
Within three days of the seminar send a thank you email/note to clients who attended. To clients who said they were going to attend but didn’t and clients who couldn’t attend, send a follow up email and attach a copy of the presentations and other information such as factsheets, invite them to contact you if they want any further information, or to make an appointment.
Evaluation
Within two or three weeks of the seminar being held, take the time to review the results. Talk to staff who attended and get their feedback on what worked and what could be improved, analyse the feedback forms from attendees, then check the outcomes against your original objective – did you achieve the results you were looking for? Review the costs to put the seminar on, work out what the cost per attendee is and what the cost per appointment is. It’s good practice to capture all the results and learnings in a document so that you can refer to it when you decide to run another seminar.
By following these tips you will ensure that clients and prospects have a great experience and you get the results you were looking for
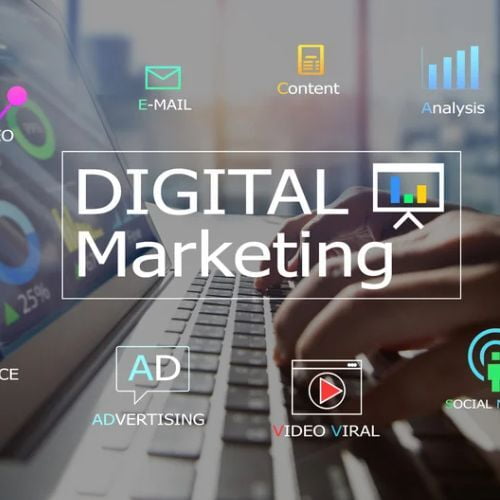
MF DISTRIBUTORS face several MARKETING CHALLENGES. The industry is a tightly regulated market where breaking the rules can lead to lawsuits, fines, and damaged reputations. Other issues include:
- Building trust
- Escaping commoditization
- Maintaining brand consistency
- Dealing with limited resources
Turning these challenges into opportunities gives you a competitive advantage. You can reshape the landscape and secure your place in the fintech industry. To succeed, you must take a digital-first approach that meets your target audience’s needs.
When you embrace digital marketing, you attract MF customers to the space they’re most comfortable—online. Here are six strategies to include in your plan:
- Social media engagement
- Content marketing investment
- Influencer partnerships
- Paid media targeting
- Mobile experience focus
You can contact us freely for any help in terms of planning your Digital Marketing Strategy. Simply fill up your trial form to get a call back : 30 Days Free trialOr call us freely at : 7607793112
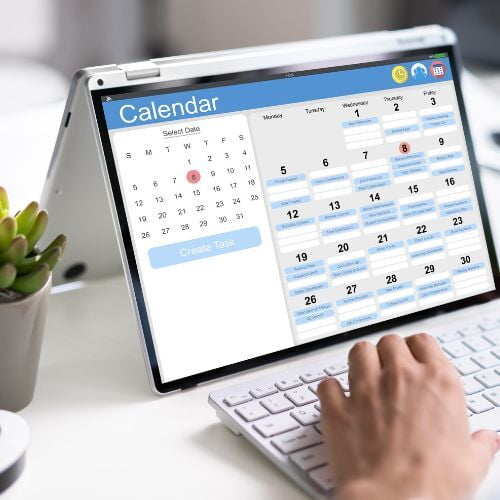
A content calendar is where you keep track of every piece of content you’re planning to create. Here's how to create one in Google Calendar :
There are several content calendar apps out there, but if you'd rather not deal with complicated software and templates, Google calendar is your best bet. It is simple, easy, and, best of all, completely free. We’ll show you how to use it to plan your content strategy in seven easy steps.
1. Create a New Calendar
The first thing you need to do is create a new calendar for your content. Open up Google Calendar and navigate to Other Calendars on the left side of the screen. Click on the Plus sign to the right of it and select Create new calendar. You will see a new screen with fields for your calendar's name, description, and time zone. Fill them out accordingly. If you publish on multiple channels, we suggest that you create calendars for each publishing channel and name them
accordingly. https://calendar.google.com/calendar/u/0/r?pli=1
2. Share Your Calendar With Your Team
Now that your calendar is ready, the next step is sharing it with your team. Return to the Settings and sharing page and scroll until you find the Share with specific people heading. Click Add people, then input your team member's email address or name.
When you share, you can also set the level of access. As a best practice, each content team member should have minimum permission to See all event details, while only a few persons should be able to make changes or invite others. That way, there are no unwanted changes to your calendar, and every team member is carried along.
3. Color Code Your Publishing Channels
Color coding your publishing channels makes it easier for you to organize and keep track of your calendar. If you’ve created separate calendars for each publishing channel, you can easily do this in Google calendar by assigning each calendar a color.
Color coding your publishing channels makes it easier for you to organize and keep track of your calendar. If you’ve created separate calendars for each publishing channel, you can easily do this in Google calendar by assigning each calendar a color.
4. Decide Your Publishing Schedule
The key to becoming a successful content creator is consistency, and that's what this step is all about. Here you’ll decide what kind of content you’ll create, the frequency, and the publishing time. Simply click on the date and time you’d like to schedule the event and create a placeholder. It should look something like this:
Think of it like the skeleton of your content calendar. You don't have to think of content ideas right away. Instead, you can simply use placeholders to represent each piece. The point is to create a structured schedule that is both consistent and convenient for everyone on your team.
You can make this process a bit easier by adjusting your calendar view. The calendar view setting is located in the top right corner, next to the gear icon. If you click it, you can choose between several view options, including a daily, weekly, monthly, and yearly view. Tweak this setting to plan as broadly or granularly as you like.
You can contact us freely, if you need any support in terms of creating a Google Calendar for your Digital Marketing activity.